Around 1.5 million vehicles fail their MOT each year due to simple issues that could have been spotted on the driveway. A thorough pre MOT check takes as little as ten minutes and targets the exact areas that cause the most failures: lights, tyres, brakes, visibility, and fluid levels. This guide walks you through every check, step by step, so your car has the best chance of passing first time.
Key Takeaways
A pre MOT check focuses on lights, tyres, brakes, visibility, and fluid levels - the categories responsible for the vast majority of MOT failures.
Over a third of MOT failures are due to simple issues like faulty bulbs, low tyre tread, or worn wiper blades that you can spot at home in 5–10 minutes using a clear mot checklist.
Checking fuel and engine oil before test day prevents the mot tester from refusing to carry out the emissions portion of the test.
Any defect classed as a major fault means the car will automatically fail the MOT, and you cannot legally drive the vehicle until it is repaired.
Pre-MOT inspections can prevent up to three-fifths of common failures, so running these checks every year before your next mot helps keep the car roadworthy and reduces surprise repair costs.
What Is a Pre MOT Check?
A pre mot check is a voluntary inspection you carry out in the days before the official mot test. It mirrors the key areas of the mot checklist - safety, visibility, emissions, and identification items like number plates - so you can catch problems before a tester does.
It is not a legal requirement, but it significantly reduces the risk of mot failure and the cost of retests. A full assessment covers safety and environmental standards, and by replicating those checks at home, you address most of the items that trip up many drivers.
A pre mot check differs from a full service. Services cover routine maintenance such as timing belts and engine tune-ups. A pre MOT test focuses only on the items the tester inspects. Some garages offer paid pre-MOT inspections using lifts and diagnostics, which is worth considering if you suspect hidden problems.
In Great Britain, every car over three years old must hold a valid mot. Routine checks can proactively identify wear and tear on vehicles, so spending a few minutes before the test date saves time and money.
Quick At‑Home Pre MOT Checklist (5–10 Minutes)
Think of this as a fast walk-around you can do on your driveway with minimal tools. Common failures include light issues, tyre problems, and poor visibility - all visible from outside the car.
Follow these steps:
Switch on all exterior lights: dipped beam, main beam, indicators, fog lights, hazard lights, reverse light, and brake lights.
Ask a friend or family member to stand behind the car while you press the brake pedal and check that both brake lights and number plate lights illuminate.
Give the horn a quick honk to confirm the horn works and is clearly audible.
Inspect the windscreen for chips and cracks, then run the windscreen wipers on a wet screen.
Walk around and check each tyre for tread depth, sidewall damage, and correct inflation.
Look under the car for any visible fluid leaks on the ground.
Turn the ignition to the "on" position and note any dashboard warning lights that stay illuminated with the engine running.
A pre-MOT check can catch minor, easily fixable faults before they become expensive test-day surprises.
Lights, Indicators and Number Plates
Lighting and signalling defects are the single most common reason vehicles fail the MOT. In fact, 29.6% of MOT failures are due to lights and signals issues. All lamps must be working correctly to pass the MOT, and most faulty bulbs cost under £5 to replace.
Here is what to check:
Headlights - both dipped and main beam must work and be correctly aligned.
Indicators - front, rear, and side repeaters should flash at a steady rate.
Brake lights - press the brake pedal and confirm both rear lights activate.
Fog lights - if fitted, front and rear fog lights must function.
Hazard lights - all indicators should flash simultaneously.
Reverse light - engage reverse gear and confirm illumination.
Number plate lights - at least one rear number plate light must work. An obscured or missing light can cause an mot fail.
For number plates, the rules are straightforward. Registration plates must be clean, securely attached, and easily readable. The front plate should be white and the rear yellow, both with the correct font and spacing. Plates must be fixed securely with no cracks, fading, or non-standard characters. Cracked, badly faded, or non-reflective number plates can be recorded as a defect in the mot test result and lead to failure.
Replace faulty bulbs before the test - it is one of the cheapest fixes that prevents one of the most common failures.
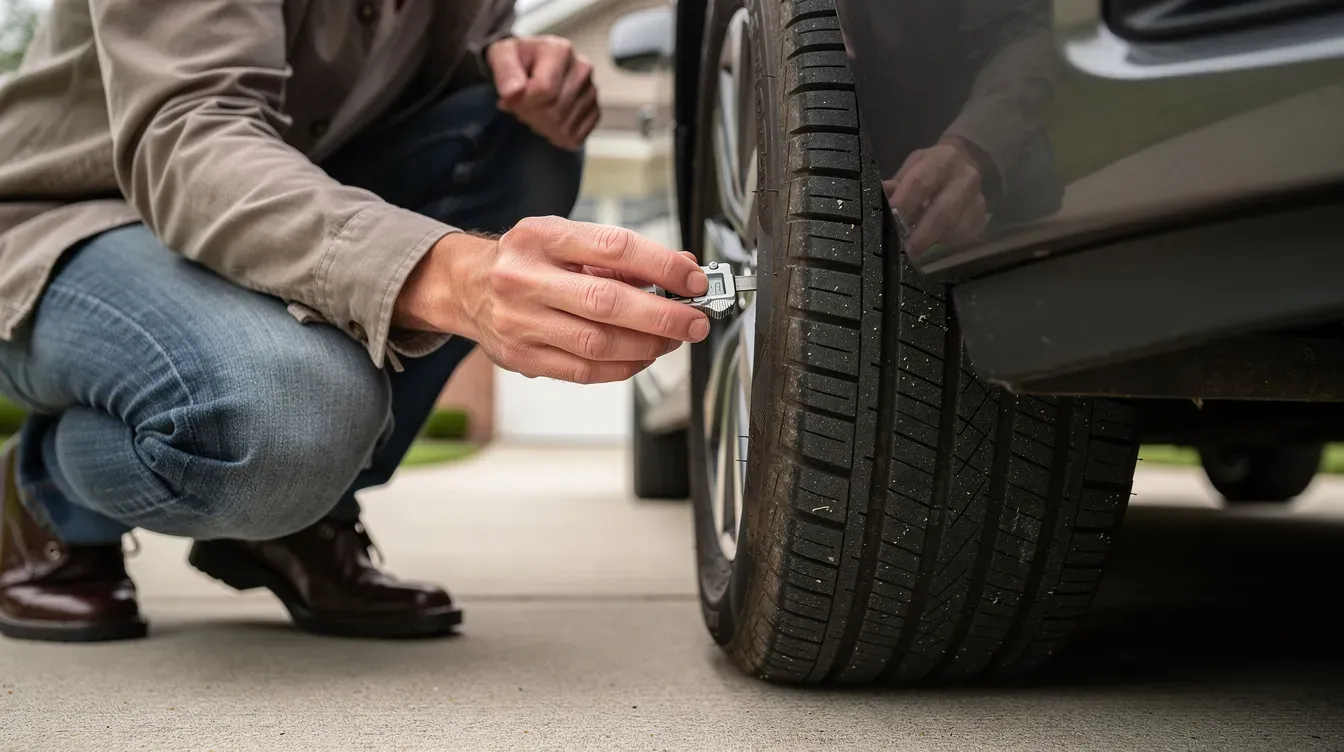
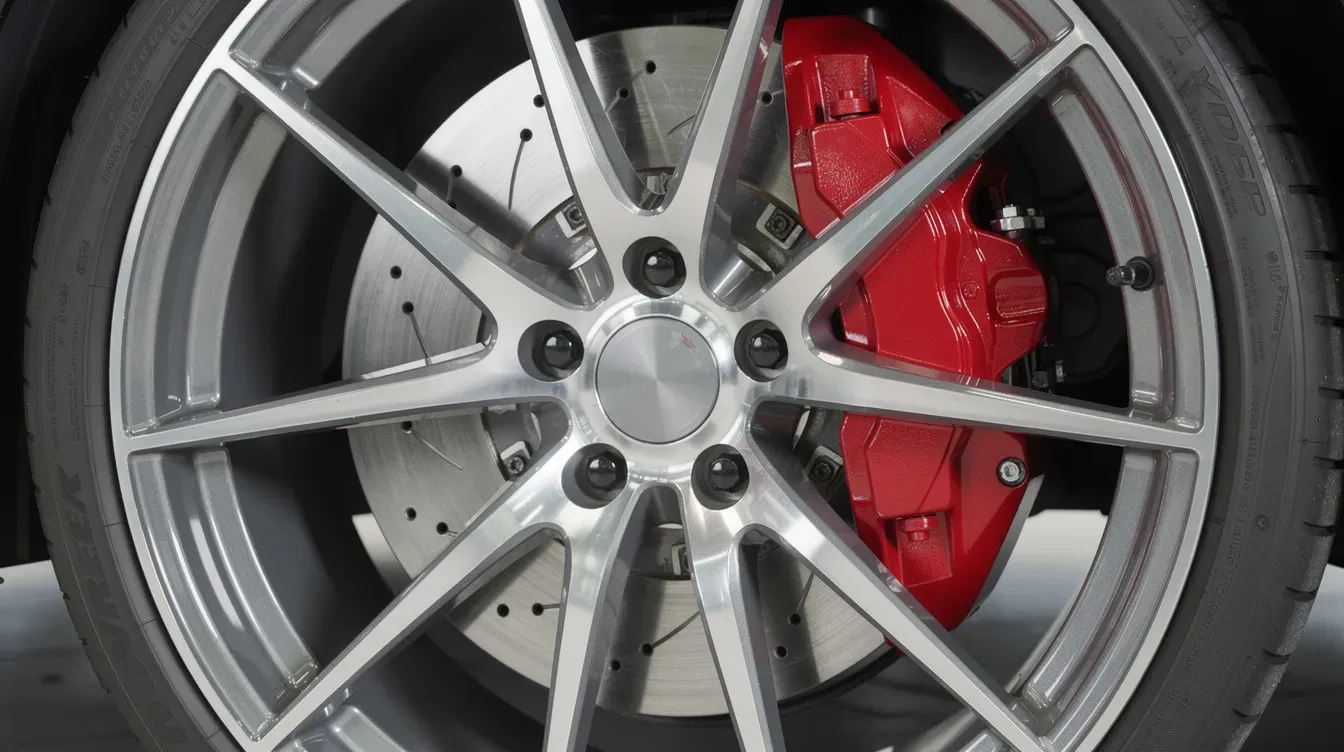
Tyres, Wheels, Steering and Suspension
Tyre and suspension faults are safety-critical items that regularly result in a major fault. Around 20.2% of MOT failures are related to suspension problems, and tyre issues account for a significant share on top of that.
Tyres check
The minimum legal tyre tread depth is 1.6mm, measured across the central three-quarters of the tyre's breadth and around the full length of its circumference as a continuous band. You can do a quick check with a 20p coin: insert it into the main grooves, and if you can see the outer border of the coin, the tread depth is approaching the legal limit.
Also look for:
Sidewall damage - cuts, bulges, or exposed cords.
Mismatched tyre sizes on the same axle.
Incorrect or uneven tyre pressures (check when cold, referencing the vehicle manufacturer's recommended figures inside the door frame or fuel filler cap area).
Wheels
Inspect each wheel for cracks, bends, and loose or missing wheel nuts. If centre caps hide the nuts, remove them to confirm everything is securely attached.
Steering and suspension
Perform a bounce test on each corner - press down firmly on the wing and release. The car should settle within one or two bounces. If it continues bouncing, the shock absorbers may be worn. Listen for knocks over bumps, and during a slow drive, turn the steering wheel to full lock in both directions to check for unusual noises or resistance. Any pulling to one side under braking could indicate alignment or power steering issues that will be flagged during the test.
Brakes, Handbrake and Warning Lights
Brake defects account for 17.2% of MOT failures, making brakes one of the most critical areas to check before your appointment.
Basic road test
Find a quiet, straight road and apply the brakes at moderate speed. The car should stop in a straight line without grinding noises, vibration through the brake pedal, or pulling through the steering wheel. If any of these occur, have the brakes inspected by a garage before the mot test.
Handbrake
Test the handbrake on a gentle slope. It should hold the vehicle firmly without the lever reaching the top of its travel. Count the clicks - if you need more than about four or five to get a secure hold, the cable or mechanism may need adjustment.
Fluids and warning lights
Open the bonnet and check the brake fluid reservoir. The level should sit between the MIN and MAX marks. Low or contaminated brake fluid is a major fault.
On the dashboard, watch for:
Brake system warning light
ABS warning light
If either stays illuminated with the engine running, expect the mot tester to record a major fault. The same applies to other safety-related warning lights, so address any lit symbols before test day.
Visibility: Windscreen, Wipers and Mirrors
Anything that blocks or distorts the driver's vision can contribute to an mot fail. These checks take under two minutes.
Windscreen check
Windscreen damage over 10mm in the driver's area fails the MOT. The driver's area (sometimes called "Zone A") is a vertical band roughly 290mm wide, centred on the steering wheel. Elsewhere in the swept area, damage over 40mm can also result in failure. Even stickers, dashcam mounts, or dirt that obstruct the driver's vision in the swept area count as defects.
Wiper blades
Windscreen wipers must clear the windscreen without smearing. Test them on a wet screen and look for juddering, streaking, or large missed patches. Worn wiper blades are cheap and take minutes to replace. An empty screenwash bottle can cause an MOT fail too, so top up the washer fluid before you go.
Rear view mirrors
Check all mirrors - interior and both exterior. Each must be securely mounted, free of cracks that distort the view, and adjustable from the driver's seat. Anything limiting the driver's vision through the mirrors is a testable item.
Fuel, Engine Oil and Other Fluids
An mot tester can refuse to carry out the emissions part of the test if the car does not have enough fuel. A vehicle must have enough fuel for emissions testing during the MOT, so aim for at least a quarter-tank before arriving.
Engine oil
Check the engine oil level using the dipstick on level ground. If the level is at or near the MIN mark, top up with the correct grade recommended by the vehicle manufacturer. Low engine oil can affect emissions readings and may also give the tester grounds for refusal.
Other fluids
A quick visual check covers:
Fluid | Where to check | What to look for |
|---|---|---|
Coolant | Expansion tank | Level between MIN and MAX; no visible leaks |
Power steering fluid | Reservoir (if applicable) | Correct level; no whining when turning |
Washer fluid | Screen wash bottle | Topped up; jets spray effectively |
Brake fluid | Reservoir under bonnet | Between MIN and MAX; clear, not dark |
Serious leaks of oil, fuel, or coolant visible on the driveway can be classed as major faults and lead to an immediate mot fail. Check the ground beneath the car after it has been parked overnight.
Interior Checks: Seats, Seatbelts and Controls
Interior safety items are often overlooked during a pre mot check, yet they regularly cause mot failures.
Seats and seatbelts
The driver's seat must adjust and lock securely to pass the MOT. Slide it forward and back, tilt the backrest, and confirm it locks firmly without rocking under pressure. Then check every seatbelt in the car:
Each belt should latch securely into its buckle.
Inertia seatbelts must lock when tugged sharply.
Belts should retract properly without snagging, fraying, or twisting along their full length.
Horn and controls
Give the horn a quick honk from the driver's seat. It must be loud enough to be clearly heard by other road users. A muffled or silent horn is a fail item.
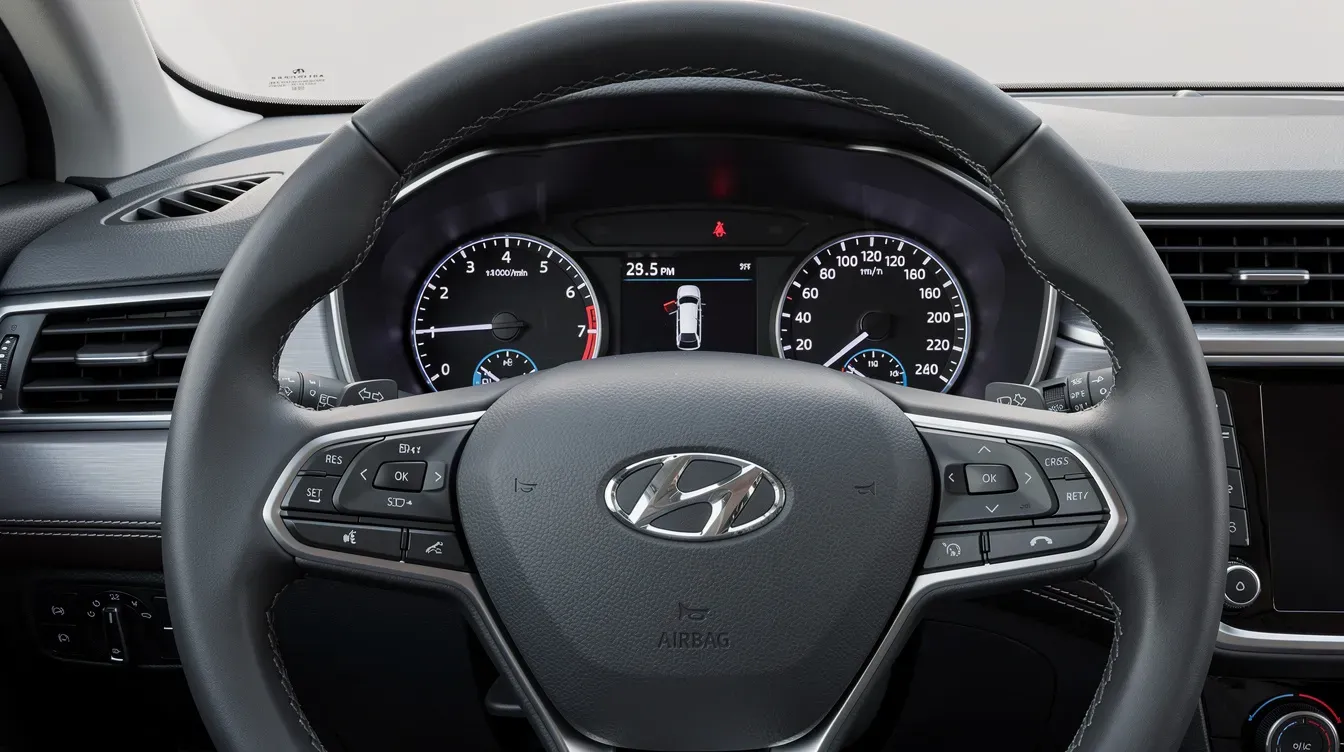
Dashboard warning lights
With the engine running, scan the dashboard. Warning lights for airbags, engine management, ABS, or stability control that remain illuminated are typically recorded as minor faults or a major fault depending on the system. Address these before test day - some may need a diagnostic tool to clear or identify the underlying issue.
Common MOT Failures and How Pre MOT Checks Prevent Them
Here is how the most common mot failure categories break down:
Failure category | Approximate share |
|---|---|
Lights and signals | 29.6% |
Suspension | 20.2% |
Brakes | 17.2% |
Tyres | 18–25% |
Driver's view (windscreen, wipers, mirrors) | 6–8% |
Each of these maps directly to a simple pre mot action:
Lights → walk-around bulb check, replace faulty bulbs.
Suspension → bounce test at each corner, listen for knocks.
Brakes → road test for straight-line stopping, check fluid level.
Tyres → tread depth with a 20p coin, sidewall inspection.
Visibility → windscreen check for chips, wiper blades test, mirror condition.
MOT defects fall into three categories: dangerous problems that mean the car must not be driven, a major fault that causes an automatic MOT failure, and minor faults recorded as advisories that do not prevent a pass. Identifying issues early stops them escalating from advisory to major.
Keep a written mot checklist each year. If an advisory for low tyre tread or worn pads appears, fix it before your next mot rather than waiting for it to cross the legal limit. Proactive maintenance is always cheaper than emergency repairs on test day. A pre-MOT inspection is crucial to avoid failed tests, and checks include the condition of lights, tyres, and brakes as a baseline.
After Your MOT: Understanding the MOT Test Result
Once the test is complete, the mot test result is recorded digitally and on paper. A VT20 certificate means a pass. A VT30 is a refusal or failure certificate listing every defect found.
Your online MOT history shows all recorded defects, advisories, and pass/fail outcomes. Treat advisories as a to-do list before the next mot - they highlight components that are wearing but have not yet crossed into major fault territory.
If you disagree with the mot test result, raise it with the testing garage first. If that does not resolve the issue, DVSA offers a recheck procedure where the same items can be retested. Combining advisories with a thorough pre mot check each year greatly reduces the risk of future mot failures and keeps the car in safe, roadworthy condition between tests.
When your mot expires, you cannot legally drive the vehicle on public roads unless travelling to a pre-booked test. Keep track of the expiry date and just book your appointment in good time to avoid a lapse in your valid mot.
FAQ
How long before my MOT should I do a pre MOT check?
Aim to do your main checks 3–7 days before the test. That window gives you enough time to order parts, book online for any minor repairs, or visit a garage. On the morning of the test, do a quick repeat - confirm all lights are working correctly, washer fluid is topped up, and no new warning lights have appeared. Many drivers leave it until the last minute, but a few days of buffer makes all the difference.
Can I do a pre MOT check myself or do I need a garage?
Most visual and functional checks - lights, tyres, windscreen wipers, horn, number plates, fuel and engine oil level - can be done at home with no special tools. A tread depth gauge or 20p coin, a torch, and a friend or family member to check brake lights from behind the car are all you need. A garage pre-MOT inspection is useful if you suspect hidden problems like corroded brake pipes, worn exhaust system components, or electrical equipment faults that need diagnostics.
Does a pre MOT check guarantee my car will pass the MOT test?
No. A pre mot check significantly improves your chances by eliminating many common failure items, but it cannot guarantee a pass. MOT testers inspect the car under more rigorous conditions - on ramps, with load applied to brakes and suspension, and with emissions analysers. Hidden corrosion, an exhaust check revealing catalytic converter issues, or sensor faults may only emerge during the formal test. Still, catching the obvious problems at home gives you the best chance of passing.
What happens if the MOT tester refuses to test my car?
Refusal can happen if the car has very low fuel or engine oil, is excessively dirty so that inspection is impractical, or is unsafe to drive onto the ramp (for example, dangerous problems with sharp edges from bodywork damage). The tester issues a formal refusal, and you will need to correct the issue and rebook. Having enough fuel and topping up engine oil before arriving avoids the most common refusal reasons.
Is it worth booking an early MOT if I’m worried about failing?
Yes. You can book your mot up to one month minus a day before the expiry date and keep the same renewal date. This means if your car does fail, you still have time to arrange repairs while the old certificate remains valid - as long as no dangerous defects were recorded. It removes the pressure of rushing repairs and lets you shop around for fair prices, giving your car a proper chance to pass on the retest without any legal requirements being breached.